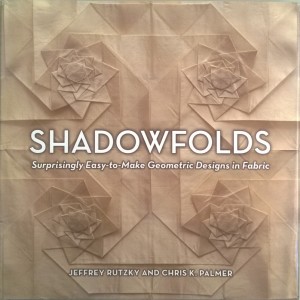
D Ich bin total fasziniert vom Buch "Shadowfolds". Ich kaufe zwar so gut wie keine Handarbeitsbücher (abgesehen von den Japanischen, die ich jedoch auch selten kaufe, da sie mir zu teuer sind), aber hier in dem Buch treffen sich Mathematik, Stoff und Origami. Mit den erstaunlichen Ergebnissen. Was für mich unwiderstehlich ist.
E I'm completely in love with the shadowfold technique. I've even purchased the book "Shadowfolds" despite of me never buying non-japanese craft books. It joins together math, fabric and origami, who can resist such a combination.
D Im Grunde erinnert sich das Shadowfold an canadian smocking: man näht einige Punkten auf dem Stoff mit einem Faden durch, zieht und verknotet den Faden und zupft die somit entstandenen Falten zurecht.
Für eine Vorführung in unserer Patchworkgilde habe ich ein Teststück in dieser Technik gemacht. Anstatt von der im Buch empfohlenen Seide habe ich den wesentlich günstigeren Batist genommen und bin mit diesem Ersatz zufrieden.
Das ist das Ergebnis, mein Shadowfolds-Deckchen, rechte Seite:
E Basically, the shadowfolds technique can be viewed as a variation of the canadian smocking. It's the pattern that makes the difference.
I've made a kind of a small tablecloth for a presentation in our local quilt gild. I took cambric as a cheaper substitution for silk, it worked very good.
This is my first experience in shadowfolds. The right side:

D Und hier ist die linke Seite gegen das Licht.
E ... and the wrong side with a backlight:
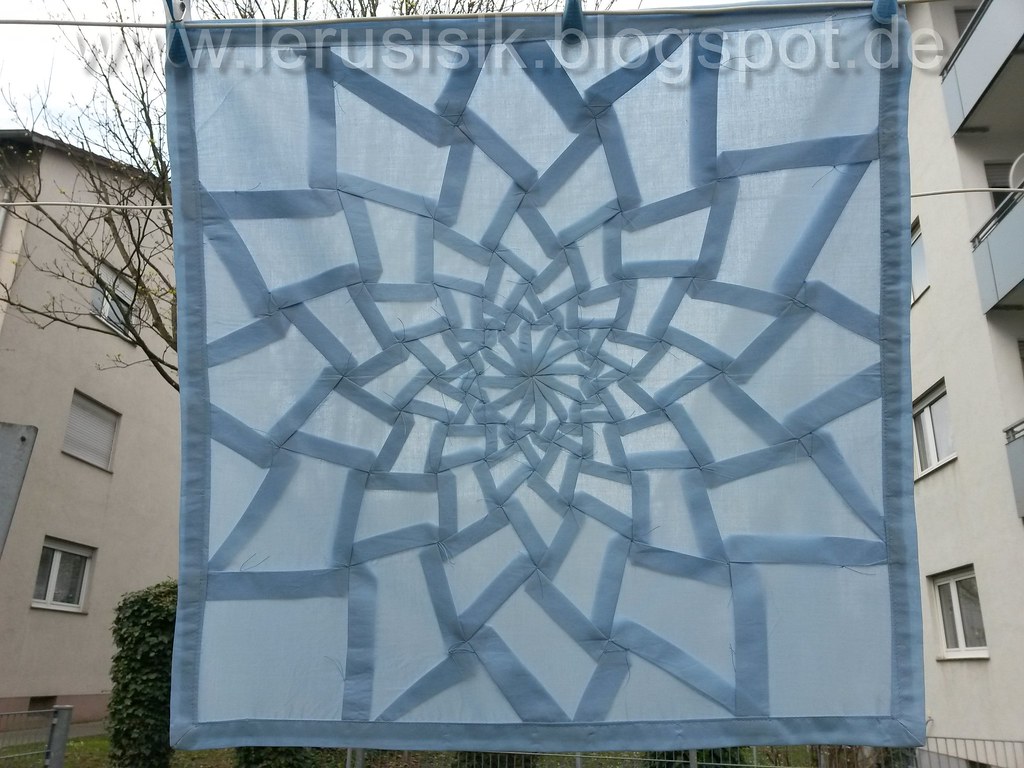
D Es ist sehr windig heute, deswegen fast alle Fotos sind eher geneigt. Dafür aber sieht man die gefaltele Oberfläche:
E It was really windy today, so almost all my photos are rather slanted. Like this one. But it really highlights the fabric surface:

D Am Ende ist das Deckchen nicht schlecht geworden, aber alles anders als perfekt. Was soll ich noch verbessern?
1) Warum habe ich gedacht, dass sich die frei liegende Fäden in Falten verstecken? Die sind sehr gut sichtbar auf der linken Seite geblieben. Nächtes mal alle Ende verbergen.
2) Die Vierecke am inneren Kreis sind Quadrate, aber je weiter zum Rand, desto mehr sind sie drachenförmig und sollen anders geglättet werden.
3) Ich habe die ungewöhnliche zäckige Ränder aus dem Buch nicht geschafft, stattdessen mit einer Doppelbordüre umgefasst. Sieht ordentlich aus, ist aber nicht meine Sache.
Alles in allem, nicht schlecht fürs erste Mal.
E On the whole, the result is acceptable, but not perfect. There are still issues that can be improved:
1) I didn't bury the ends of the thread at all maybe hoping that they'll disappear in the folds. They didn't.
2) The polygones near to the center point are squares, but closer to the edge they become kites and I haven't fold these kites properly.
3) I couldn't cope with a nice polygonal edge from the book and made a squared mitered border. Not too bad, but I loved the uneven edge!
Summary: not bad for the first time, but practise, practise and more practise!
E I'm completely in love with the shadowfold technique. I've even purchased the book "Shadowfolds" despite of me never buying non-japanese craft books. It joins together math, fabric and origami, who can resist such a combination.
 |
Für eine Vorführung in unserer Patchworkgilde habe ich ein Teststück in dieser Technik gemacht. Anstatt von der im Buch empfohlenen Seide habe ich den wesentlich günstigeren Batist genommen und bin mit diesem Ersatz zufrieden.
Das ist das Ergebnis, mein Shadowfolds-Deckchen, rechte Seite:
E Basically, the shadowfolds technique can be viewed as a variation of the canadian smocking. It's the pattern that makes the difference.
I've made a kind of a small tablecloth for a presentation in our local quilt gild. I took cambric as a cheaper substitution for silk, it worked very good.
This is my first experience in shadowfolds. The right side:
D Und hier ist die linke Seite gegen das Licht.
E ... and the wrong side with a backlight:
D Es ist sehr windig heute, deswegen fast alle Fotos sind eher geneigt. Dafür aber sieht man die gefaltele Oberfläche:
E It was really windy today, so almost all my photos are rather slanted. Like this one. But it really highlights the fabric surface:
D Am Ende ist das Deckchen nicht schlecht geworden, aber alles anders als perfekt. Was soll ich noch verbessern?
1) Warum habe ich gedacht, dass sich die frei liegende Fäden in Falten verstecken? Die sind sehr gut sichtbar auf der linken Seite geblieben. Nächtes mal alle Ende verbergen.
2) Die Vierecke am inneren Kreis sind Quadrate, aber je weiter zum Rand, desto mehr sind sie drachenförmig und sollen anders geglättet werden.
3) Ich habe die ungewöhnliche zäckige Ränder aus dem Buch nicht geschafft, stattdessen mit einer Doppelbordüre umgefasst. Sieht ordentlich aus, ist aber nicht meine Sache.
Alles in allem, nicht schlecht fürs erste Mal.
E On the whole, the result is acceptable, but not perfect. There are still issues that can be improved:
1) I didn't bury the ends of the thread at all maybe hoping that they'll disappear in the folds. They didn't.
2) The polygones near to the center point are squares, but closer to the edge they become kites and I haven't fold these kites properly.
3) I couldn't cope with a nice polygonal edge from the book and made a squared mitered border. Not too bad, but I loved the uneven edge!
Summary: not bad for the first time, but practise, practise and more practise!